Showing posts with label Stampin Up Designer papers. Show all posts

Friday, 11 July 2014

Thank you & Scrapbook Class Kits to go !

Incentive Trip 2015

Thank you to my wonderful team, The Hearts, and my amazingly fabulous customers !  I have been lucky enough to earn the Incentive Trip to Madeira next year.  I truly couldn’t have done it without you all – so very, very many thanks for your trust and loyalty *insert big heart*

Why not join our amazing team ?  You too can earn lots of incentives and bonus’ for doing what you love !  The starter kit is currently priced at £99 Surprised smile Where else could you start your own crafting business for £99 !  You get to choose £130 worth of products of your choice AND you will receive a FREE stationery kit worth £45 to help you get up and running ! 

Do you have more questions ? Good … go to my FAQ page HERE for more details.

Ready to sign up ?  Then click the link HERE to sign up online !

If you have any more questions, please do not hesitate to contact me on carole.bryson@gmail.com or call/text me on 07747 465186.

SCRAPBOOK KITS TO GO !

In August, I am running a 2-3 day Crop in Croydon.  All of the places have now sold, but I am making the scrapbook kits for the crop available to you to pre-order!

Below are sneaky peaks of the layouts, and they are available to you for £5.50 per kit – and include enough products to complete TWO layouts at least AND the instructions will be included for the main layout.

There are 6 available kits, and they will be posted out to you first class on the 6th August – just in time for you to ‘virtually’ join in the merriment !  Payment will be due by the 26th July so that I can order the products and pack them ready to post out to you.

Demonstrators:  The instructions only, are available to purchase at £2.50 per kit, and will be available on the 11th August.

Layout 1

Grateful theres you 1Grateful theres You 2

Layout 2

Love You 1Love You 2

Layout 3

Thankful 1Thankful 2

Layout 4

Today we 1Today we 2

Layout 5

Layout 5 sample 1Layout 5 sample 2

Layout 6

Last layout 1Last layout 2

There will also be a card kit available AND a mini album, so keep popping back for more details !

UPDATES

There have been more items added to the WEEKLY DEALS HERE

and more items added to the CLEARANCE RACK HERE

Don’t forget, if you order a half or full Project Life kit from me, then you will receive my Online Class for FREE !

To pre-order the scrapbook kits, or if you have any questions, queries or wish to place an order, then please contact me on carole.bryson@gmail.com or call/text me on 07747 465186

Have an amazing weekend !  Cal xxxxxxx

Monday, 31 December 2012

Its a Mash Up ! & a sMASHing MEGA New Years offer !!!

Happy New Years Eve !  I hope 2013 will be everything you wish for – and more !
Talking of the start of 2013 means only one thing in the Stampin Up! world – the start of Sale-a-Bration, which this year starts on the 22nd January !  As Stampin Up! is celebrating their 25th Anniversary this year, then you can be assured that this years Sale-a-Bration is the best EVER !  You will seriously NOT be disappointed – so if you have Christmas money left, then save it until the 22nd January !!
Just to give you a little taster of what is ahead in 2013, I have made another little video for you …… this is my “Mash Up” Scrapbooking Kit and SAB sneaky peak !
Its a Mash Up!
I will be offering a monthly “Mash Up” Scrapbooking Kit starting in January.  You will receive two of these divided pages each month together with scrapbook papers, cardstock, journalling tags, embellishments etc., , so that over a 10 month period, you will be able to complete an album.  Each month I will be showing you 2 completed pages, but you will receive enough products to complete at least 2 x DOUBLE SIDED pages (four pages total).  I have a dedicated customer only page on my blog (password protected), where I will upload a video each month, and instructions on how to complete your pages.
sMASHing OFFER – If you sign up or commit to the “Mash Up" kit for 10 months, then at the end of the 10 month period,  you will receive a 12” Linen Ring Album for FREE ! (only if you sign up before the 7 January).
DETAILS – The cost per month is £15 (plus £2.50 postage), ETA:  Kit is now £10 plus postage and you will receive everything mentioned above.  If you are interested in committing to the kit, then please contact me on carole.bryson@gmail.com or 07747 465186.  If you wish to pay by paypal, then please send me your paypal email address, so that I can invoice you each month, together with your name, address and contact phone number.  If you wish to pay by standing order/bank transfer, then please let me know in your email or text, and I will let you have the details.
(I will be able to accept credit/debit card payments shortly – but I will keep you updated on this).
So there you go …. lots to look ahead to … but I will leave you with another, little Sale-a-Bration sneaky peak …
card4
As always, if you have any questions or queries, please contact me on carole.bryson@gmail.com or 07747 465186
Happy New Year to you all !   Cal xxx

Wednesday, 5 December 2012

Tell ‘em what you want, what you really, really want !

How to get what you want this Christmas!

Subtlety will get you nowhere.  Share your favourite things from Stampin Up! by sending your gift list straight to the inbox of anyone who owes you an amazing present this Christmas.

Fill in this Wish List including my details, and then send it off  to anyone and everyone !   I will do the rest !

What more could you, or your gift givers want ??

Wish List picture

My contact details are, carole.bryson@gmail.com or text/call me on 07747 465186

My Favourite Things

Talking of Christmas, here is a list of 10 of my most favourite things – seriously, I’d be happy with anything off of this list, but I will love you forever if you send me David Beckham !

favourite things 1

This layout was made using Storytime papers, SU! chipboard alphabet, Apothecary Accents journalling dies and lots of ink !

Continuing with Christmas ….

card1

This is another of the ‘small but quick’ Christmas cards that I have made with matching envelopes using the fabby diagonal scoring plate.

As always, if you have any questions or queries, please contact me on carole.bryson@gmail.com or 07747 465186

DON’T FORGET THOSE WISH LISTS !   Happy Crafting ! 

Sunday, 28 October 2012

World Spectacular !!!!!!!

Well not quite … but I did make these two layouts using the NEW fantastically lush, World Spectacular designer papers that are in the Annual Catalogue …

I also used the stamp set Affection Collection.  I like to get my moneys worth out of the stamps that I buy, and I always try and think of scrapbooking projects AND card projects that they can be used for, before committing to the purchase.  I like to get value for money, and in this day and age – who doesn’t !!  The same goes for the papers, I have to be able to use them for ALL projects, and thats the great thing about Stampin Up! papers – they’re double-sided, so you get all the benefits of double the papers !

These layouts are based on a couple of the classes from the UKS CYBERCROP that is currently running, and will be running until next week – so if you haven’t signed up yet – you MUST do – the classes and challenges are truly stunning, and there’s lots more to come !  Click on the link HERE and sign up ……

CC 1

Patchwork Layout and Instructions

CC2

Instructions:-

This layout was made using lots of different patterned paper cut into  2.5” x 2.5” squares and then cut diagonally into triangles. 

I then found the centre point of the layout, and measured a 5”x5” square in the middle. 

I then lay out all the triangles around the square until I was happy.

I adhered the photograph into the middle blank square, and then adhered four triangles OVER the photograph using foam pads/dimensionals.  This adds dimension to the layout.

NOTE:  I inked all the triangles, and faux stitched some of them before adhering to the layout

I then distressed the edges of the layout MY way

Add embellishments as you want

Voila !

cc2a close up

The photograph is hidden under the patchwork triangles by using dimensionals to add some depth to the layout.

As always, if you would like to place an order, or if you have any questions, then please contact me on 01706 351299 or carole.bryson@gmail.com

Happy Crafting !

Tuesday, 25 September 2012

Awesome Autumn !

Don’t you just love the Autumn ….. all the colours of the season continually changing, the cold nights snuggled up under a blanket and sipping hot chocolate …. well hot coffee in my case as I hate hot chocolate – yeuch yeuch !

Orchard harvest 2

This layout was again (sorry) made using the fantastic Orchard Harvest designer papers.  These papers are just tooooooo useable !  I’m on my second packet of these papers already !!!

This is a really easy layout to make, and I’ve kept it pretty simple so that it can be used for both new scrappers and old alike.    More experienced scrappers could add spritzing, painting and more embellishments to ‘dress it up’ even more.

Instructions

  1. Cut strips of paper measuring 1” x 10” and 11/4” x 10”
  2. Distress all the edges of the strips of paper using either the distressing tool on the Stampin Up! cutter kit, or using a pair of scissors.  Then ink all the edges using Early Espresso inkpad and dauber.
  3. Distress the edges of the background paper using the same technique as above.
  4. Adhere the strips of paper as shown
  5. Adhere the photo to a piece of Rich Razzleberry cardstock leaving a 1/14” edge all around the photograph
  6. Using one of the NEW large jumbo sticky rounds (only available in the Autumn/Winter catty) and some Crumb Cake tulle, tie a knot in the end o f the tulle and keep wrapping the tulle around the knot – twisting the tulle as you keep turning.
  7. Adhere the tulle circle as shown, and then add a tulle bow (finished with an antique brad)
  8. Add title and journalling as shown

Voila ! How easy ?!!!!!

As always, if you would like to place an order, or if you have any questions or queries, then please contact me on carole.bryson@gmail.com or 01706 351299/07765 847062

DON’T FORGET – YOU HAVE ONLY 5 DAYS TO ORDER FROM THE CURRENT 2012 CATALOGUE !!!!

Sunday, 23 September 2012

Scrapbooking … oh, how I love thee …

Yesterday, I spent a lovely day scrapbooking with my friend Marlene.  For those who come to the Rochdale Crop, you know who Marlene is – for those who don’t come to the Rochdale Crop … why not ?!!!!  Anyway, Marlene helps me run the Rochdale Crop, and helps me prepare for parties, classes, kits and most of the time, my life ! She is the type of friend who just knows how I work, and what is going through my head.  I’m really fortunate that I have a couple of friends who know me this well, and I just wanted to take the time to thank you all xx

Anyway, back to the scrapbooking.  Marlene and I spent approximately 8 hours scrapbooking yesterday and putting the world to rights.  Sometimes we talk.  Sometimes we don’t.  With our friendship, the silences don’t matter because that is when we are creating.  I don’t really like ‘scrapping’ on my own, I need companionship, but likewise I need the silence to keep the thought process going ….. for me, Marlene is the best scrapping companion, and my best critic – until it comes to white space …. jeez, she hates white space, whereas I really love it  ….  keep your eyes peeled over the next few days for my white space projects …. how do you feel about white space ? Love it or loathe it ?  Let me know !  Why not share your white space projects and link them to this blog – there could be a small prize for the best one ……. Winking smile

So, to keep Marlene happy, here is a non-white-space project !
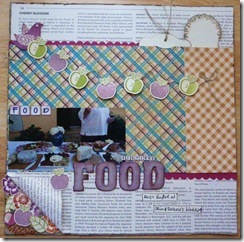
Orchard harvest 1

This layout uses :-

  • First Edition speciality designer papers for the base
  • Orchard Harvest designer papers
  • Crumb Cake cardstock
  • Very vanilla cardstock
  • Rich razzleberry cardstock
  • Perfectly Preserved stamp and die set
  • NEW ‘secret’ stamp set from the NEW Annual Catalogue
  • Ink Pads – rich razzleberry, pumpkin orange, lucky limeade, early espresso
  • Two tags die
  • Scallop border punch
  • Onboard alphabet
  • Linen thread

INSTRUCTIONS

  1. Trim 1/4” from all sides of the First Edition papers, and attach to crumb cake cardstock base.  Fold up the bottom left hand corner and secure with a glue dot.
  2. Trim ‘tartan’ paper to 9” x 6.5”
  3. Trim ‘orange’ paper to 2.75” x 6.5”
  4. Attach the papers as shown – DO NOT ADHERE permanently, as you are going to tuck the scallop border underneath in the next step).  Also, do not adhere the top right hand corner of this layer as you are going to tuck the tags in there.
  5. Cut a strip of rich razzleberry cardstock 1”x12” and punch the strip using the scallop border punch.  Attach to patterned papers as shown.
  6. Cut out two tags using very vanilla cardstock using the two-tags die.  Ink the edges in early espresso.  Using a darning needle and some linen thread, blanket stitch around the scalloped tag as shown.  Tuck these two tags under the top right hand layer.
  7. Stamp out the apples using rich razzleberry ink and lucky limeade ink, and then die cut.
  8. Tie a bow in a piece of linen thread and lay over the layout as shown above.  Attach apples over the linen thread by using dimensionals.
  9. Stamp flowers and leaves and cut out.  Tuck these under the turn up on the bottom left hand side of the first edition papers.
  10. Using rich razzleberry ink, ink the onboard alphabet title, and attach.
  11. Add your journalling using strips of very vanilla cardstock
  12. Finally, distress the edges of the complete layout using either a distressing tool, or by running a pair of sharp scissors along the edges of the layout.  Finish the distressing by inking the edges.

Voila !  I hope you like this tutorial and will have fun creating your own Smile

STAMPERS GROUP

I only have TWO places left for a new Stampers Group starting in October.  What a great time to start spreading the cost of buying stash with the launch of a new Annual Catalogue !  You commit to spending £15 ore more (plus postage) for 10 months.  During the course of the 10 months, you are the ‘virtual’ hostess for one of those months, and you will earn AT LEAST £25 to spend on anything that you like from any of the current catalogues. 

All you have to do, is make a brew, grab a chocolate biscuit … and browse the catalogues.  You then email me and pay me – and voila ! a few days later, your new stash will be plopping through your door – what could be easier !!!

Contact me on carole.bryson@gmail.com or 01706 351299 to secure your place.   Please let me have your home address, email address and a phone number that I can contact you on if I need to.

NEW CATALOGUE

As I’m sure you all know by now, the new Annual Catalogue is launching on the 1st October !  Believe me, it is absolutely MASSIVE !!!!!  We will then be inline with the catalogues that our Stampin Up! sisters receive in the United States – everything  … lock, stock and smoking barrel.   This catalogue is NOT to be missed !   It is jam-packed full of ideas, inspiration and of course, shed loads of new goodies !!

Sadly, due to the size of the new catalogue, they are extremely expensive to buy and post.  I do not like, and do not believe in charging for catalogues.  Do Asda or Tesco’s charge for you to browse through their shops … nope ….  So, the compromise is …. I will be charging £5 for the catalogue, HOWEVER, I will deduct this £5 from the first order that you place.  Win-win !

As always, if you wish to place an order, or if you have any questions or queries, then please contact me on carole.bryson@gmail.com or 01706 351299/07765 847062

Sunday, 2 September 2012

Scrapbooking Samples …

crop sample 6 Calcrop sample 9 Cal

Both of these layouts were made using the gorgeous Orchard Harvest designer series paper (Item no. 126895 £9.95)  You will see on the layout with the green background, that I have also used the adaptable Perfectly Preserved stamp set and matching framelit dies. 

The layout on the left uses the reverse side of one of the papers, and different patterned papers from the set.  The layout on the right, uses a Crumb Cake background sprayed with reinker before adding papers etc.  The leaves were made using various colours of cardstock with the Build-a-Blossom punch (£15.50)

You can buy these items separately, HOWEVER, Stampin Up! have caught onto the bundle idea, and have combined both this stamp set and framelit set, and offered them with a 15% discount off the original price.  Yes, you can buy both of these items for :-

£39.50 wood Item No. 129943 or £35.50 unmounted Item No. 129944 – bargain !

Don’t forget to check out both the Retired List (see yesterday’s post for the links), and the NEW Autumn/Winter Catalogue (link to the right of this post).

REMEMBER – if you spend £50 this month, you will be eligible to enter the draw to win one of 3 £10 gift vouchers OR the chance to win a BIG SHOT !

To place an order, or if you have any queries/questions etc., then please contact me on carole.bryson@gmail.com or 01706 351299/07765 847062

Happy Crafting !

Wednesday, 29 August 2012

Autumn ….. I thought it would ..

…… be a break from Christmas !!!!!!!

But its NOT !!!!!!!!!!!! ha ha ha ha ha …. just want to try and fool some of my anti-Christmas-at-the-moment friends – you know who you are girls ahem Denize, Jackie G & Co !!!

acetate layout 1

This layout was made using the flocked acetate sheet from the beautiful Candlelight Christmas designer series paper.  The paper is available in the new Autumn/Winter Catalogue from Stampin Up! which is launching this weekend ! In this set you will receive a set of 12 double sided papers, 2 of which are flocked acetate – the quality is undeniable, believe me !

Instructions

1.  Stamp and die-cut three ornaments from the Ornament Keepsake bundle using real red and gumball green inkpads.

2. Stamp and cut out the large label from the Everything Eleanor stamp set using real red.

3. Cut three strips of paper from the Candlelight Christmas designer papers. Make the varying lengths and widths.

4. Punch out a gumball green label with the designer label punch.  Also cut out another label, but push the short end  back into the punch, and punch a { sign.

5. Adhere your layers as shown in my layout.  I added some real red grosgrain ribbon.  To do this, I put on some red sticky strip, and pleated the ribbon in the ‘normal’ way, and then crossing and twisting it over.  To ensure the ribbon laid flat, I put glue dots under the folds.

6. Cut some thin strips of very vanilla cardstock, and add your journalling.

7. To adhere the stamped and cut out baubles, I threaded a darning needle with bakers twine.  I wrapped the twine around the top of the bauble, and then poked the needle through the acetate.  I brought the twin down the back of the page following the same line of twine at the front, and then taped down the end at the back of the bauble so that the twine on the back didn’t show.

8.  Adhere the { sign and the green decorate label as shown. 

9. Add a real red grosgrain bow, your title using whatever medium you prefer -  and voila !

If you would like to place an order for any of the products used in this layout, please contact me on carole.bryson@gmail.com or call me on 01706 351299

KEEP YOUR EYES PEELED ON SATURDAY FOR THE ONLINE LINK TO THE NEW AUTUMN/WINTER CATALOGUE !

Happy Crafting !

LinkWithin

Related Posts Plugin for WordPress, Blogger...